Better Black and White Conversion
© Copyright UK 2004 Matthew Page. All rights reserved worldwide.
Updated 4th May 2004
The wonderful and amazing Russell Brown opened my eyes to a really easy way of converting colour images to black and white, a method that works equally well in Photoshop as well as Elements. (This tip is available from http://www.russellbrown.com with a QT movie: www.russellbrown.com/tips/moviesps/ColortoB&W.mov and PDF: www.russellbrown.com/tips/pdf/colortoB&W.pdf)
However, good as this technique is, I always found my B&W images a bit ‘grey’, or urgh, lacking the “punch” that I desperately wanted.
Well, in true Russell Brown style, look no further! Roll up for the Better Black and White tutorial, and be amaaaazed!
The Russell Brown Steps
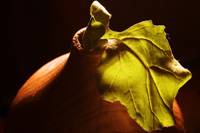
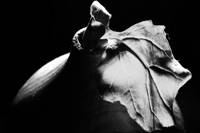
Here’s a sample image:
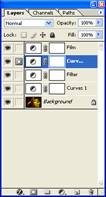
First off, add the two Hue & Saturation layers required by the Russell Brown technique.
· Add an adjustment layer, Hue & Saturation
o Leave all settings at default, for now
o Name the layer “Filter”
o Change the layer mode to “Color” in the layers palette
· Add another adjustment layer, Hue & Saturation
o Wind the saturation back to -100 to create greyscale
o Name the layer “Film”

Well, that’s pretty good so far… but before we go and tweak the Filter layer, let’s add the next bit of Photoshop magic!
First Curves Layer
Ah yes, you’ll be thinking, just add a curves layer to expand the contrast. Not quite! If you do that I find you get all kinds of strange and unwanted effects.
Here’s what you do, though:
· Select the background layer
· Add an adjustment layer, Curves
o
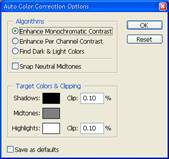
Before changing the curve itself, hit the “Options…” button
o
Under “Algorithms”, select “Enhance
Monochromatic Contrast” and click Ok. This step is only required
if you are using the automatic mode and letting Photoshop do the ‘curve’ for
you.
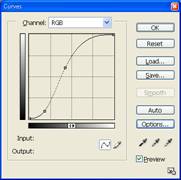
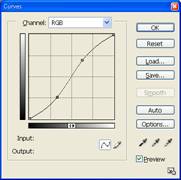
o Now adjust the curve, and make a nice sharp “S” curve:
§ Input 108, Output 155
§ Input 45, Output 23
§ These are good starting points
o Accept the changes to the curves adjustment
· Change the layer mode to “Luminosity”. Using Luminosity as the blending mode reduces unwanted colour and saturation shifts while increasing the monochromatic contrast.
Tweaking the Black and White
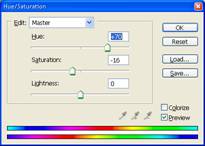
Now double click the Hue/Saturation “Filter” layer and tweak the Hue and Saturation values to get the right look. You can, of course, do the Russell Brown thing, and also edit the Hue/Saturation of individual colour sections (by choosing the “Edit” combo box in the Hue/Saturation dialog).
Second Curves Layer
To add an extra bit of “bite”, you can add another curves adjustment layer between the filter and film layers, not as sharp a curve this time:

Finishing
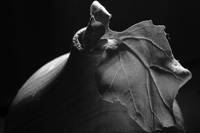
This technique works really well on high contrast colour portraits!
Of course, you can use the opacity of each layer to tweak the overall effect. Just go ahead and have some B&W fun!!
I’ve included “MattMatic B&W.atn” action that does all these steps for you. Just click the top triangle in the Actions palette, and select “Load Actions…”.
For additional Black and White conversion plugins, consider Fred Miranda’s excellent BW Workflow Pro – www.fredmiranda.com (PC: www.fredmiranda.com/shopping/BW, Mac: www.fredmiranda.com/shopping/BMW)