Photoshop Basic Layers Tutorial
25th June 2004 “MattMatic”
Starting Up
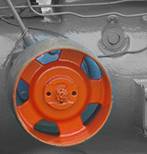
First of all, download the tractor.jpg image and open it in Photoshop. Many of the techniques here apply to Photoshop Elements as well. Hopefully, by working through this tutorial you should get a good working idea of the world of Photoshop layers!
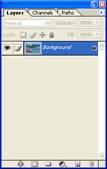
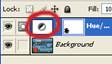
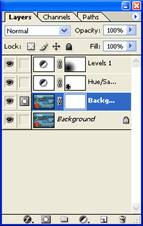
Make sure the “Layers Palette” is visible (you can press F7 to show it). The palette should look like this:
Selective Colour
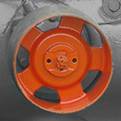
Let’s make this easy. First of all, we’ll turn this into monochrome… using layers (so I can show you the power of layers).
Click on the “add adjustment layer icon” - ![]()
From the menu that appears, select “Hue/Saturation” and put saturation to -100:
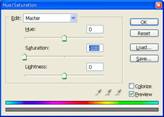
Click OK to accept the dialog.
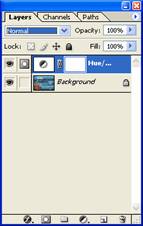
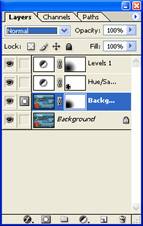
The image will be in monochrome, but now your layers palette should look like this:
“Ah!” you say, “But I can do that with the “Image / Adjustments” menu item just as well!”
That’s true, but let’s now tackle the layer mask to see what layers can do.
Layer masks
Layer masks are incredibly useful for applying selective changes to images. The layer mask is on the right hand side:
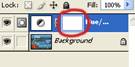
Can you can see the little white and blue selection around the mask? That indicates the mask has focus – whatever you do (brush, gradient, eraser) will affect the mask, and not the image. (Remember this for later on…)
Setting up the brush tool
Before you proceed to the next step, you’ll need a soft black brush. Here’s how to do it.
Pick the brush from the tool palette:
![]()
Press the “D” key to set default black/white colours:
![]()
Drop down the brush selection:
![]()
And pick a soft edged brush:

Also, make sure the opacity is set to 100% for now.
![]()
Choose a suitable size, around 30 (you can use the [ and ] keys to make the brush smaller and larger!)
Editing the mask
Lets now bring back the red fly wheel in the tractor image. How? Easy.
With the layer mask selected (it should already be selected), just paint over the fly-wheel!
As you paint, the colour comes back!
Now how did that happen?
You are painting black onto the layer mask of the Hue/Saturation adjustment. Black creates a “hole” in the mask saying, in effect, “Don’t apply the adjustment here”. White, on the other hand, says “Let the adjustment shine through.”
Advantage of a mask
What if you go a bit too far in your painting and bring the colour back somewhere you don’t want it? Just switch to a white brush (press the “X” key to exchange foreground and background colours!) and paint.
You can remove the blue from in between the fly wheel by painting white (thus saying “apply the adjustment here”):
Shades of effect
Since the mask is just a grey scale image, you can paint grey to achieve an in-between effect. The easiest way is to adjust the opacity of the brush (and pressing the top-row number keys will select an opacity. “5” will select 50%, “2” will select “20%”, and “3”-then-“5” will select 35%)
This is very useful for blending in an effect, or as we will see layer, an overlaid image.
Examining the mask
You can examine, and edit, the mask on its own by Alt-clicking the layer mask in the layers palette.
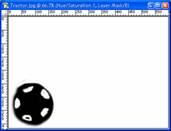
Now you can clean up the mask with the brush. Indeed, any filters can be run on the mask (Gaussian blur, levels, curves etc). The mask can even be copied, as with any other image.
Click on the background layer, or Alt-click the layer mask again to view the main image again.
Temporarily disabling the mask
Shift-clicking the mask will temporarily disable it:
Notice the red cross in the layer mask area.
Shift-click the mask again to re-enable it.
Advantages of layers
One of the advantages of layers is their ‘change-ability’. Double click the Hue/Saturation layer in the palette:
And the Hue/Saturation dialog box will appear again! You can now tweak the values. Enter these:
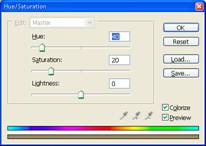
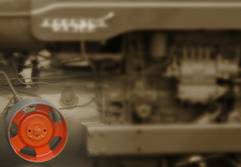
And you’ll get a toned tractor, but with the red fly-wheel!
Before and After
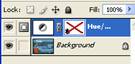
To view a “before” and “after”, you can just disable the layer completely. Click the eye in the layers palette:
Layer opacity
If you’ve followed the example so far, what if you like the toning, but think it’s too strong? You have the option of changing the layer opacity (how opaque or transparent it is). Each layer has an opacity setting:

The value in the palette affects the currently selected layer (in this case, the Hue/Saturation adjustment layer).
Try setting the value to 70% - you will get a 70% application of toning. 30% of the original image (and colour) will show through, giving an aged look.
Stacking
Of course, you are not limited to just one layer. Let’s highlight the flywheel by changing the lighting.
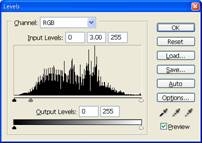
Add another adjustment layer, this time a Levels layer.
In the dialog, enter these values:
The whole image will go much lighter.
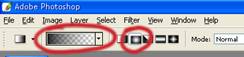
Now, select the gradient tool:
![]()
Make sure black is the foreground colour (press the “D” key).
Select the “Foreground to Transparent” gradient from the pull down menu, and select the radial gradient button:
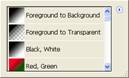
That down, click on the middle of the fly-wheel, hold and drag out (to the “M” of MAJOR, for instance) and the fly-wheel will be back in solid colour again, graduating out to the edges.
Again, you can double click the adjustment and change the levels to your hearts content (say changing the centre from 3.00 to 0.50) to make the image darker.
Selective blur
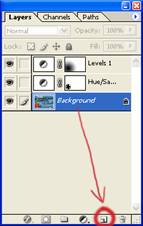
Let’s take this a stage further. Select the background layer, and duplicate it. There are two ways to do this:
1) Press Ctrl-J
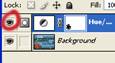
2) Drag the layer down to the New Layer icon in the layers palette:
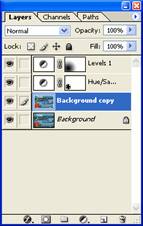
With the “Background copy” layer selected, run a Gaussian blur with radius 4.0 pixels. Now the image will look completely blurred.
However, notice this copy layer has no mask!
Adding a layer mask
There are two ways to do this:
1) Use the menu: Layer / Add Layer Mask / Reveal All
2) Click the Add Layer Mask icon:
![]()
Photoshop Elements: You can use Richard Lynch’s Hidden Elements tools to expose an add layer mask tool in Elements 1 or 2. www.hiddenelements.com
This gives a palette:
Now, take the black brush in hand and paint away on this new layer mask! Wherever you paint black, the original underlying sharp image will show through! Magic!
If you find the edges of your newly created mask are too abrupt, run a large Gaussian blur on the layer mask, say radius 50. (You can also use the gradient tool to create a nice gradient blend.)
Conclusion
Hopefully this has given some basic experience in layers and layer masks! It really is just up to your imagination!